

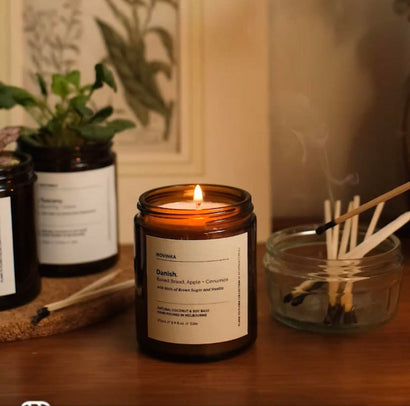
CANDLE CARE
Burning a candle isn't rocket science, but it does take a little bit of TLC to do it right. We've got some tips below to ensure you get the most out of lighting your candle, and to stay safe while you're at it.
THE FIRST BURN IS THE MOST IMPORTANT
Think of the first burn like taking someone out on a first date. You want to do it right, and you don't want to cut it too short. And if it all goes well, you'll have a long lasting and happy relationship.
Like your date, candles have a memory from the first burn. Make sure the first burn lasts long enough so that the entire top layer of wax is melted all the way to the edge on the first go. Otherwise, your candle may create a 'memory ring' where the burn will continue tunnelling down the middle around the wick for the rest of its life.
Sounds dramatic, but it's true.
A BIT OF GROOMING GOES A LONG WAY
Too much of anything isn't good for you. That saying goes for our candle wicks too. To keep a steady flame and to prevent the wick ends from falling into the wax, use a trimmer to keep the wick trimmed to 5mm before lighting. Don't play with fire and make sure the flame is extinguished and the wax has cooled before trimming.
Don't have a trimmer? We've got you covered.
KEEP IT COMPANY, IT'S GETTING HOT IN HERE
Never leave your burning candle unattended, and try not to let it burn for more than 2 hours at a time. Once the wax reaches the halfway point, reduce your burn time to 1 hour sessions to prevent the jars from overheating. Watch out for the surface too, as the bottom of the jar can get quite hot once the candle burns down.
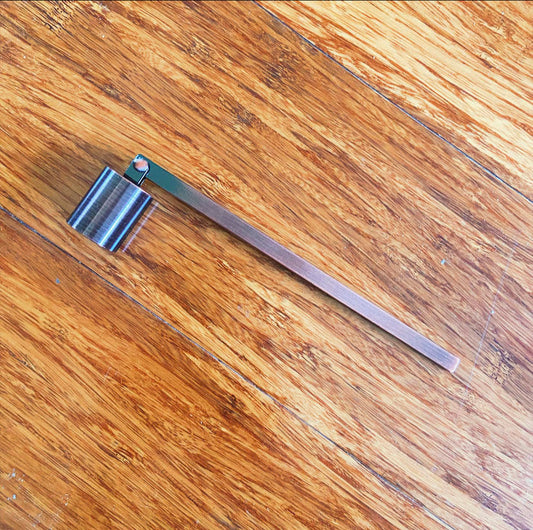
Keep your candle away from strong drafts and extinguish your flame safely each time with one of our Vintage Copper Snuffers.
KNOW WHEN TO SAY GOODBYE
For your safety, it's time to stop burning your candle when the wax is around 1-1.5cm from the bottom of the jar.
But don't worry - with MOVINKA candles, the end is just the beginning as when one door closes, another opens. Take out your FLAME TO FLORA kit and get ready to recycle your jar into a home for your new seedlings.
Candle Care Accessories
Did you know proper candle care can make your candles last up to 25% longer?
Shop Candle Care Accessories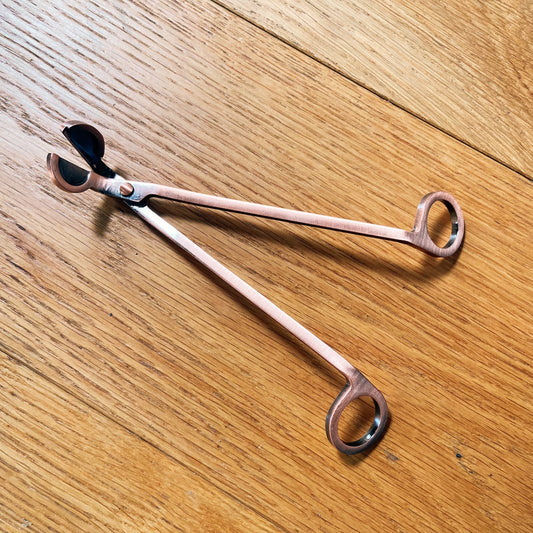
Vintage Copper Wick Trimmers
- Regular price
- $18.00
- Sale price
- $18.00
- Regular price
-
Vintage Copper Snuffer
- Regular price
- $18.00
- Sale price
- $18.00
- Regular price
-